I’ll be honest: I have no artistic talent. I can’t draw or animate anything and I try to avoid doing it because it’s usually just an embarrassment for me. If you’ve seen the drawings I made for the One World One Girl, I just use the software Microsoft Paint to create it in about fifteen minutes. So why did I take 3D Animation 1 in the first place?
Honestly, it was just a placeholder. At my high school, we use the trimester system, and English classes only take up two trimesters out of those three. I needed something to do with that one leftover trimester, and just like that, I had 3D Animation 1 as my second-period class after Spanish 1. Every day for the first trimester, I would head to the 3D Animation classroom after Spanish, which was across the school (and I got late once or twice because of the distance, plus I occasionally needed to use the restroom in between periods).
Did I have any other options that I would have preferred?
My answer is: Kind of. The only options for a one-trimester commitment were off-roll (which was something my Asian Parents didn’t want me to do) and five other fine arts options. They included Drawing and Painting, Photography, and Digital Media Production. I chose 3D Animation because it seemed the most fun to me. I think I made a pretty good decision because I like a lot of the stuff we went over. Let’s discuss a bit about my experience in 3D Animation.
The first two days or so didn’t involve any actual animation. We were mostly just introduced to the course and policies. We opened up the animation software once or twice that first week but it was mostly just to change the settings and add extra features. The software, by the way, is called Blender, and it’s one of the most popular platforms out there for 3d design. If you have taken a 3D Animation class in the past or plan to get into this, Blender is certainly a good tool. It’s very complicated for sure— there’s no doubt about that.
On the 3rd day of the class, we learned to start using Blender. By the end of that day, I could proudly say that I knew how to change the color of objects and move objects across the plane. That isn’t going to take you very far when there are millions of other mechanics, but it was a start. On the 4th day, we got our first project. We had to use whatever Blender Mechanics we knew to make a donut. That’s it. Just a donut. (Can those of you in the 3D Animation community guess what’s coming next?)
Well, there was more to it than just a donut. Our teacher expected a really good donut. A really good image. One with irresistible texture, colorful flavors, and impeccable lighting. It needed to have sprinkles with alternating colors and a randomly shaped dough. You might be reading this and thinking, how hard could it be to make a donut? As it turned out, it was much more difficult than “just a donut”.
You might be wondering how we could make a donut when all we knew was how to change colors. Well, we were given about a month to create this donut, which should be enough time to learn all the necessary skills and mechanics. We ended up watching a YouTube Tutorial from this guy called the Blender Guru (Who’s famous in the 3D community, do you know him?) who taught us everything we needed to know as he made his donut alongside us. And I must admit I’d have no idea what I was doing without him. Blender has so many different features with complex systems of usage. Here are just a few of Blender’s mechanics:
- Scale – Changing an object’s size with the keyboard shortcut
- Grab – Grabbing an object and moving it around the space
- Rotate – Rotating an object
- Vertice Grab – Grabbing a single vertice of an object and moving that vertice around
- Materials – The texture of an object. This controls all sorts of things about our object such as color and the texture itself (so is it a wooden or metal texture?)
- Particles – Adding little objects to surround a larger object. In the donuts project, we learned to use this for adding sprinkles. We also went over how to make the colors of the sprinkles vary as well as how to change their frequency.
- Texture paint – I don’t think I need to dive too deep into this one— yes, you’re literally painting the texture
- UV unwrapping – A complicated process that turns a 3D object into a 2D net

The month of work ended up with a final product of this donut:
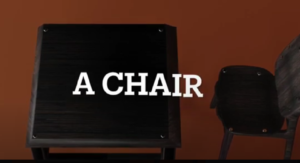
After creating a donut, we went on to our second project which was “table and chair”. As you can tell from the title, we made a table and a chair. There was another Blender Guru tutorial online on how to make a chair, so we used that to help us. The tutorial didn’t show us how to make the table, so we had to model one on our own.
Making a chair is complicated and it took me about three weeks to finish making the chair. By the time I was done with the chair, I had only a day left to make the table. If I’m being totally honest, I just did a speedrun through the creation of the table, trying to add some of the elements of the chair along the way. The table didn’t look too bad for a one-day thing, and overall I’m pretty happy with the final product of the second project.

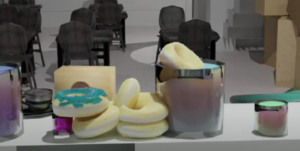
For our final project, we combined the donut and chair and table into a larger project, adding a room and whatever other objects we needed. I combined the donut, chair, table, and room to make the final project of… a donut shop!
Pretty unoriginal, I know.
Aside from the objects I already listed, I also added a few other things, including more tables, boxes of supplies for the donut shop, and a radio that was sitting on the table. On top of this was also a coffee cup which was part of the Blender Guru’s tutorial. You can clearly see the table, donut, and chair inside the picture. This all took about two weeks to create and I’m very happy with how this turned out.

Those were all the projects of the trimester that we did, but there’s one more thing to come: the Night at the Museum. Every trimester, my school does a special event called “Night at the Museum” which involves not only the 3D Animation field but also the Digital Media Production and Photography people where we make a digital museum showcasing our art. We were supposed to create our own QR code that would be printed out on a piece of paper. This QR code could be scanned in to reveal our demo reel, a short 30 second clip which displayed all the things we did this tri. The event was planned to happen at night where everyone could display their cards in person. I would totally write about the event because it seemed like a really fun and interesting thing…. But I didn’t go.
I got sick the day before the Night at the Museum so I ended up getting out of it. I was able to get back to school the day after the event and complete the assignment about the event where we had to analyze someone else’s art. Honestly, the art everyone made was pretty mediocre, but I eventually found one project from Digital Media Production that I liked.
For the final project, we had to write a few answers to open ended questions about our experience in the art field, things we’d do better and tell to new kids starting out.
So what are my final thoughts on this class? It’s great! It’s better than I anticipated and I certainly underestimated how much I would enjoy this class. Because this is a placeholder, I will not be taking this class for the rest of at least my freshman year in high school, but maybe in the future….